
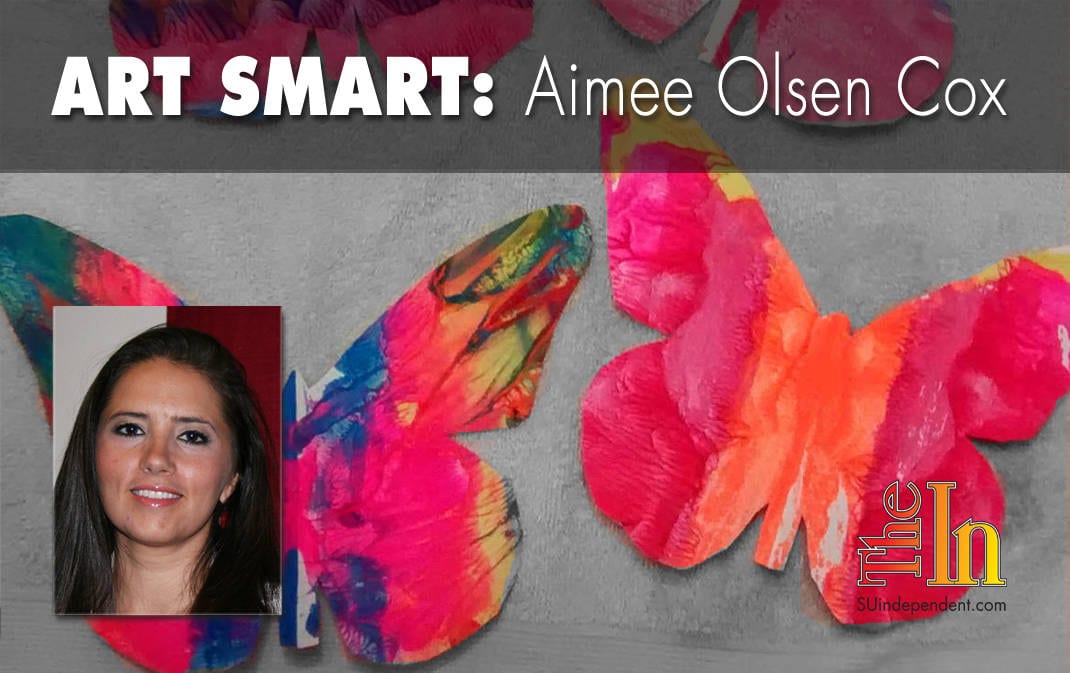

Summertime is my favorite time of the year. Every single day is spent outside. There is a beautiful path near our home that takes us down and behind some hills. The hills block all the sounds of the streets, and you feel completely removed from the city. Our favorite part of this path is the butterflies. There are always butterflies in great variety. These beautiful winged creatures have always fascinated my children. I think they do that to most people. I have never attempted to help my kids create one, however, because the symmetry of the butterfly wings is too difficult. This week, however, we found a way around it. So that is our great art project this week: creating a symmetrical butterfly. Butterfly art is really fun to create.
 Here’s what you need:
—Paint.
—Heavy paper.
—Butterfly template.
—Tablecloth.
—Paintbrushes (optional).
The inexpensive tempera paint is perfect for this project. The large bottles will cost about $2–$3. You can very easily use paper bags from the grocery store for this project. That would cost you nothing aside from what you spent on groceries. We used some of those as well as the Mix Media Paper that I love. You can draw your own butterfly template or find one online to print off and use. Paintbrushes are optional this time. I prefer them, but sometimes my children didn’t. If you already have the paints, your butterfly art can be done without spending any additional money at all. I think that is important in the summer. The less money you spend here, the more money you can spend on the important things, like snow cones.
Set up

After covering your work surface, take your paper and fold it in half. Folding it lengthwise works better, I think, but it doesn’t really matter. It just needs to be done in half. Then use that old cupcake tin to hold the paint. You will be using quite a bit, so be generous. That’s really all you need to do to prepare. Don’t forego covering your table. My children were incredibly gung-ho this time and forged ahead without covering the table. It was fine. They all got to clean it up afterward and learned important life lessons, like “don’t ruin mommy’s table.” It’s easier if no one has to learn that, though. So just make sure you lay something down, even if it’s a towel.
The process
 Keep the paper folded so that only one side is facing you. You are only going to paint one half of the butterfly. Use a generous amount of paint, and just start painting the paper however you see fit. I confess that this idea was difficult for my children to wrap their minds around. They couldn’t see a butterfly on the paper, and they struggled with the idea of using a lot of paint. I had to keep telling them to use more and more. It dries pretty quickly with the air conditioner and a ceiling fan constantly going in the summer. You need more than you think so that it will still be wet at the end.
Creating symmetry

When you are done painting one side of the paper, unfold the other side. Then fold it on top of the paper you just painted. Use the same seam you created in the first step to get it symmetrical. Then rub your hands on top of the paper to ensure that it is completely coated in the paint. This also creates an interesting pattern with the paint. Slowly open your paper. You should have a mirror image of the side you painted on the new section now.
Let it dry. The dry heat of the St. George summers is perfect for this. It takes only a couple of minutes to let the paint dry outside. Just make sure you don’t put the paper out when the sprinklers are scheduled to turn on. We accidentally did that. It was disastrous. All that hard work was just gone. And yes, painting a butterfly is hard work.
 Once your paint is dry, you can bring the paper inside. Place the template on top of the paper, and cut it out. We decided that the easiest way to do this is to fold the paper in half, as we had originally done, and place the template on top of it that way. It’s similar to how children learn to fold paper in half and cut out heart shapes. A word of caution here. I thought I had ninja-level skills with scissors, so I tried just cutting out the butterfly whilst holding the template with my hand. This is not advisable. It turns out that cutting a butterfly wing is a little more difficult than cutting a heart shape, and the template wiggles around. While my butterfly was indeed symmetrical, it didn’t exactly look like a butterfly. So I recommend using paper clips or something to hold it securely. This will guarantee that your butterfly art actually looks like a butterfly.
Display the beauty
 Once the butterflies are all cut out, they are ready to be used however you see fit. After running around for several minutes flapping the wings of their butterflies, my children wanted to hang them up somehow. We decided to use simple tape and string to hang them from the ceiling in their bedrooms. I think they would look beautiful on windows as well.
This butterfly art project is one that I really enjoyed doing because it was fast and the end product is actually beautiful. It doesn’t matter how you paint it. I had a child using all sorts of colors and patterns together. By the time you cut the butterfly out, it is beautiful. It really is. My kids are now determined to find a way to do this with other insects as well. It’s fine with me because the clean-up was the fastest it has ever been. So have fun creating your very own one-of-a-kind symmetrical butterfly art. Your kids will love it.


