
Hiking Southern Utah: The Northgate Peaks and North Guardian Angel

Trail Name: Northgate Peaks (Note: this article specifically concerns ascents of the peaks at the end of the Northgate Peaks Trail, not the trail itself, which was covered in an earlier article.)
Location: Kolob Terrace section of Zion National Park
Difficulty: Easy (the trail) to strenuous (climbing the various peaks)
Length: 4.4 miles roundtrip, add another 1/4 to 1/2 mile for each peak
Family-friendly: Yes, but less so for the peaks and definitely not for North Guardian Angel
Dog-friendly: No
Special Considerations: North Guardian Angel is a technical climb that requires a climbing rope, harnesses, slings, and knowledge on how to use them. Do not attempt to climb it unless you or someone in your party knows how to climb and rappel and how to set up anchors.
The Northgate Peaks Trail in the Kolob Terrace section of Zion National Park is an amazing trail with spectacular views. The trail itself is nearly flat, making it a perfect hike for families. The payoff at the end is the awe-inspiring vistas of the twin Northgate Peaks and the North Guardian Angel. Added possibilities are ascents of any of the peaks, including the technical route up the northeast ridge of North Guardian Angel.
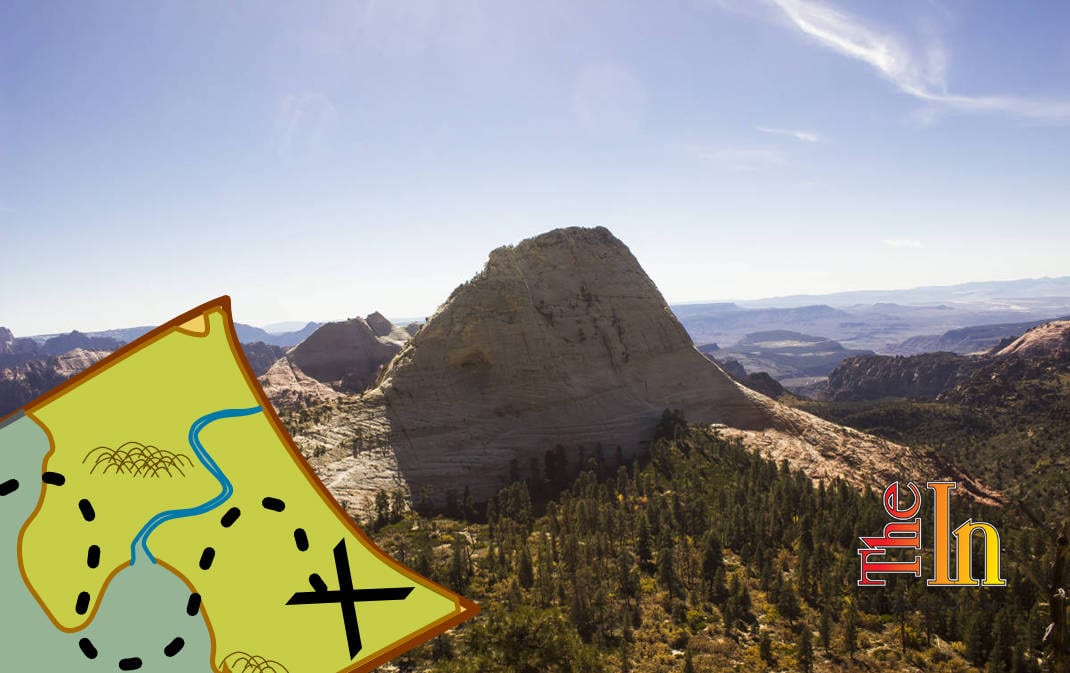
Access: To reach the Northgate Peaks trailhead, drive north from St. George Boulevard on Interstate 15 for just under seven miles to exit 16. Head east on Utah State Route 9 for 12.5 miles to the town of La Verkin. Turn right to continue on Utah State Route 9. Drive east for another 6.3 miles to the town of Virgin. Turn left onto Kolob Terrace Road. Drive for 15.7 miles through the increasingly spectacular country until the short spur road (on the right) for the Wildcat Trailhead is reached. Drive a few hundred feet to the large parking area.

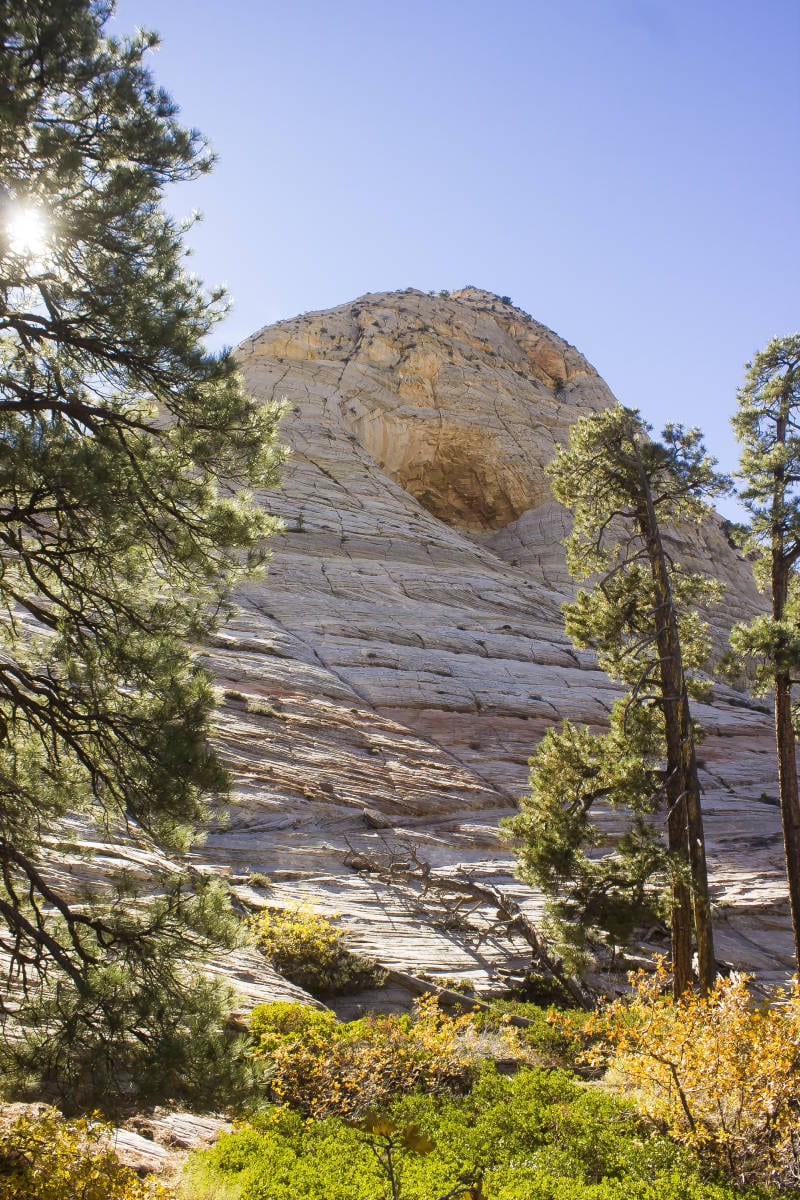
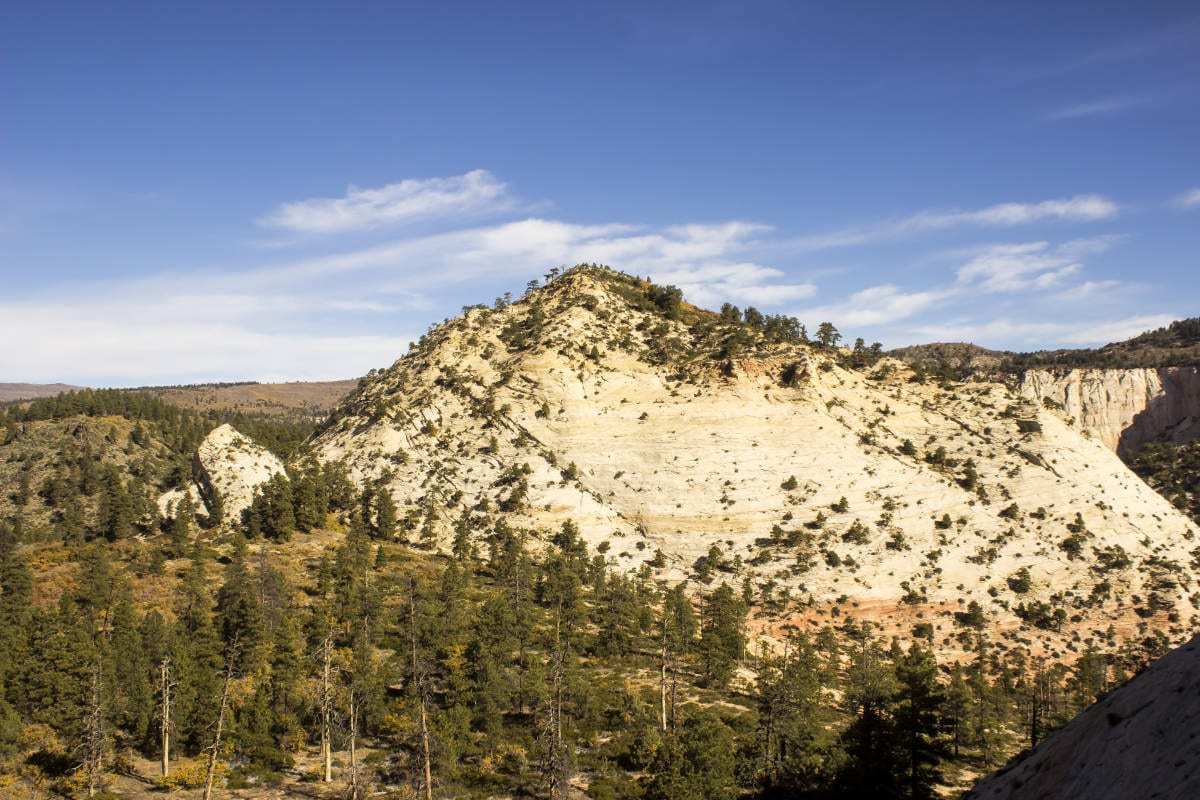
The trail heads east across grassy plains and stands of Ponderosa Pine with dynamite views of the towering Pine Valley Peak to the west. Soon the trail will be fully in the forest, with limited views. After 0.9 miles, the junction with the Hop Valley trail is reached. Continue east, and 0.1 miles further, the junction with the Northgate Peaks Trail is reached. Head south on this trail for another 1.1 miles until the end of the official trail is reached at a rocky basalt bluff with epic views of the Northgate Peaks to the east and west and of North Guardian Angel to the south. For families with young children, this makes an excellent turnaround spot. For those with a yearning for something more adventurous, however, this is just the beginning.

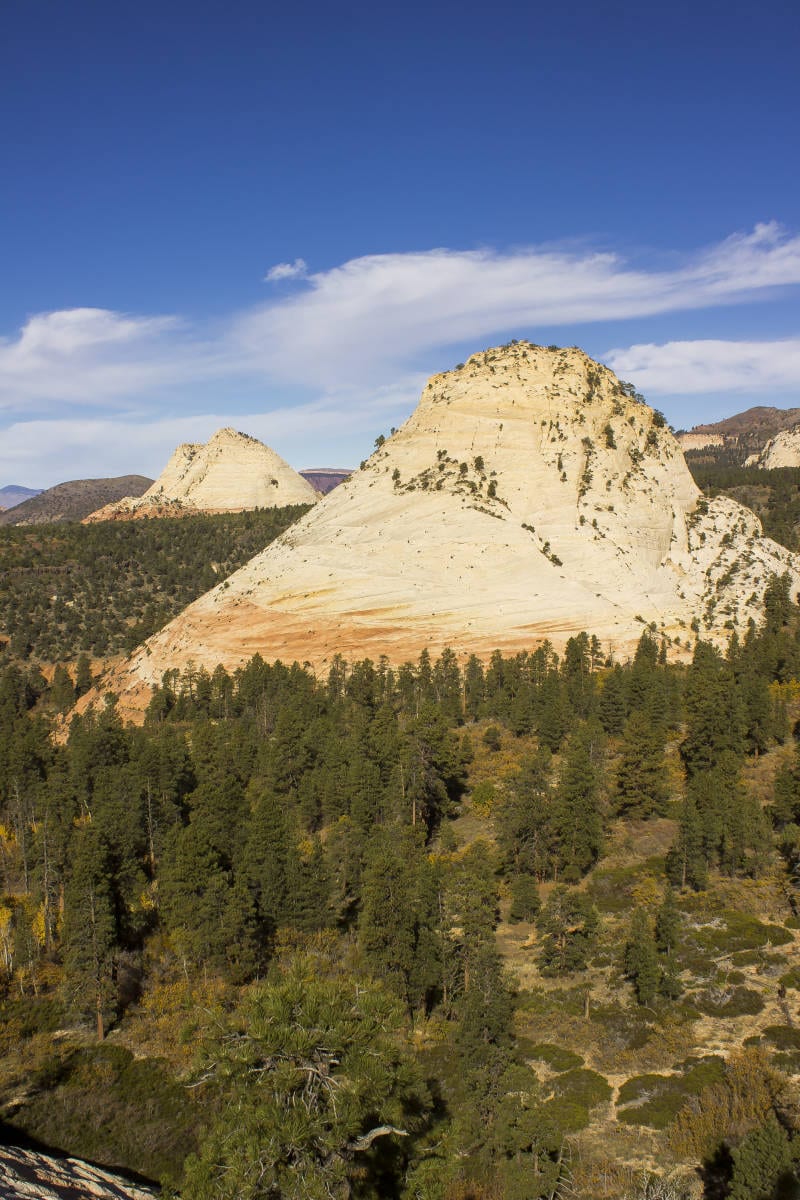
Option No. 1: East Northgate Peak
To the left of the rocky bluff, the small crag of East Northgate Peak is an excellent option for those who aspire to grander views. A steep but easy trail winds its way up the north face. Find a climber’s trail that descends from the bluff to the east, and follow this towards the slickrock area at the northern toe of East Northgate Peak. From here, head up the mountain, seeking out the trail that leads to the summit of the peak. The route should never be more than a steep trail, so if you find yourself scrambling up steep terrain, you are off-route. Small rock cairns should help guide the way to the summit. Stupendous views of North Guardian Angel and the deep canyon of the Subway greet the mountain traveler. Return the way you came.
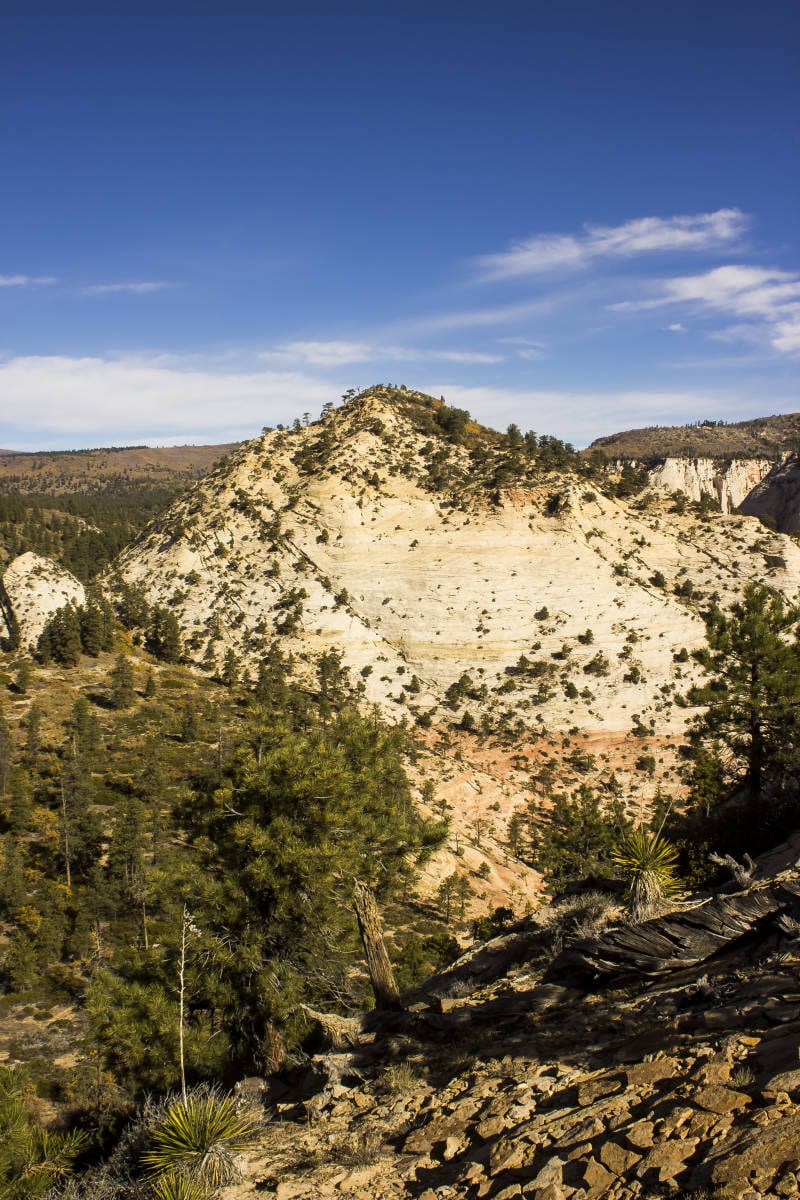
 Option No. 2: West Northgate Peak

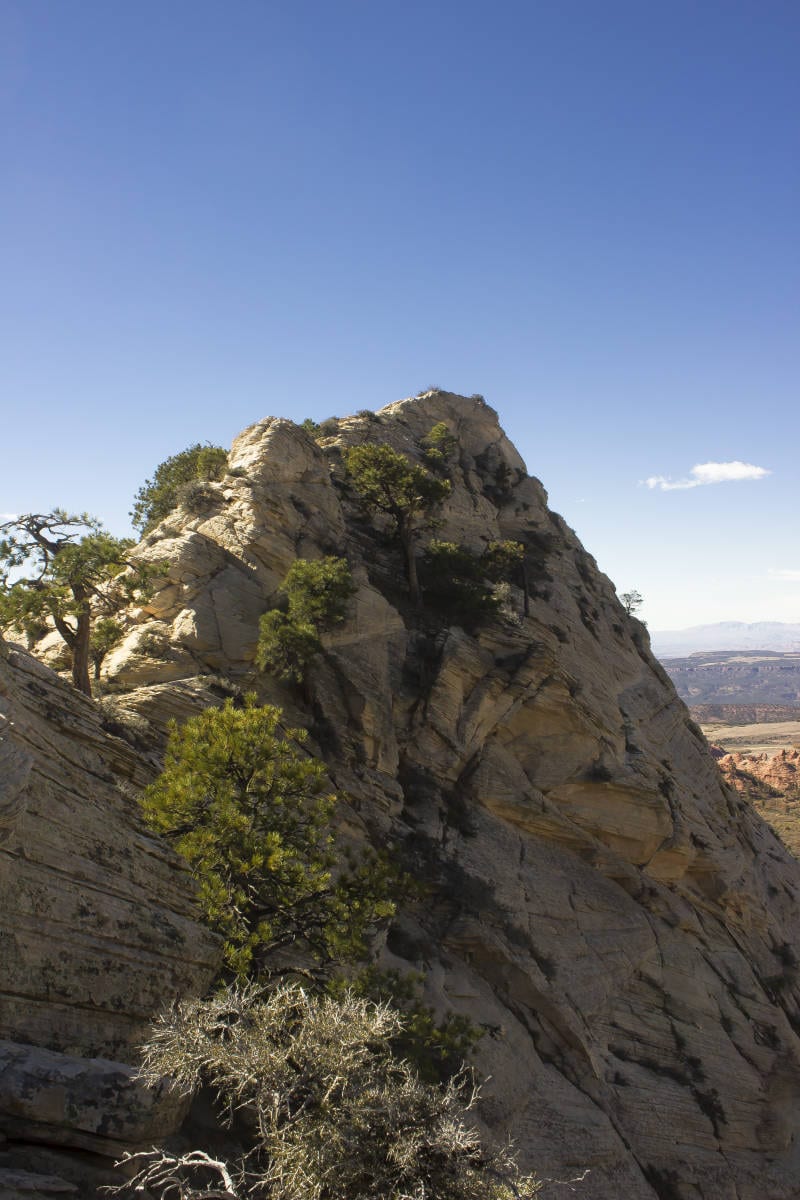
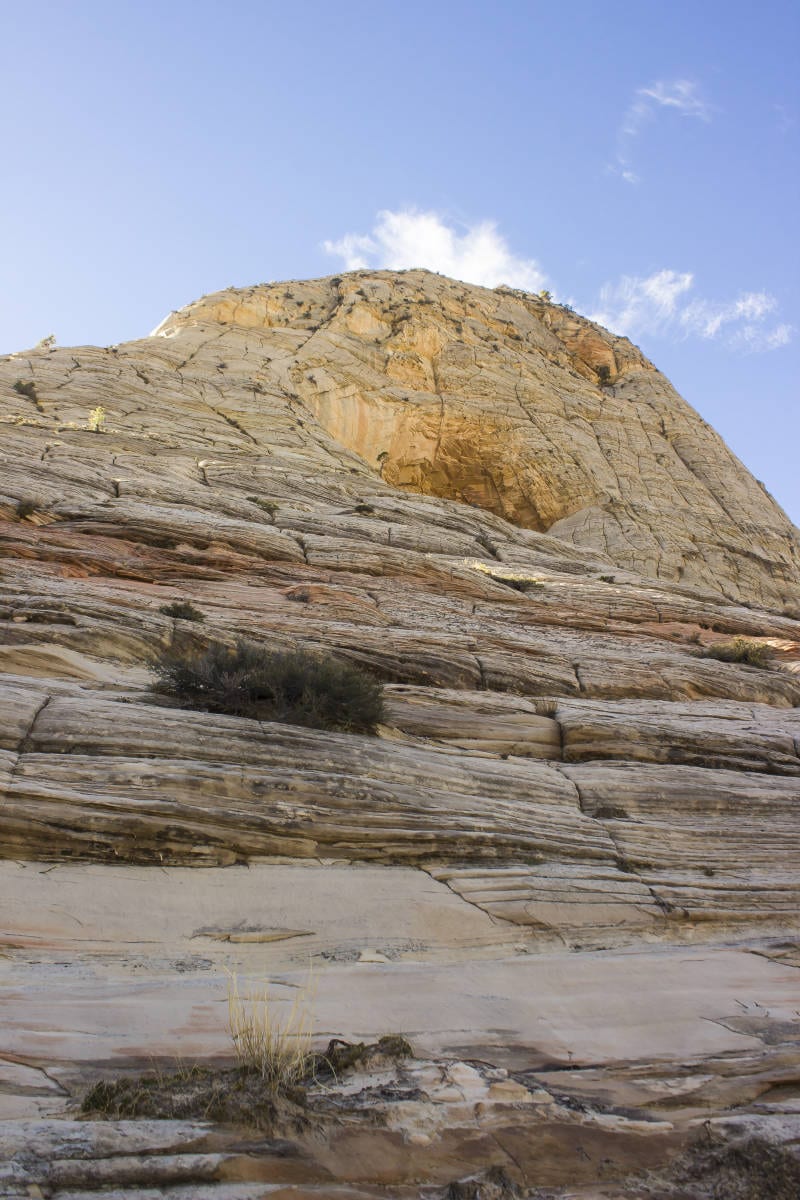
To the right of the bluff, West Northgate Peak is a much larger and much more challenging option for those with a hankering for vertical ascents. Take the same trail as for East Northgate Peak, but then head south in a draw until you can traverse across the toe of the rocky bluff. Contour around the northeast side of West Northgate Peak. Continue hiking until the north face is reached. Begin scrambling upwards, picking the route of least resistance. There can be several steep class 4 sections, but with judicious route-finding, the scrambling should never be too difficult. Continue to the summit.
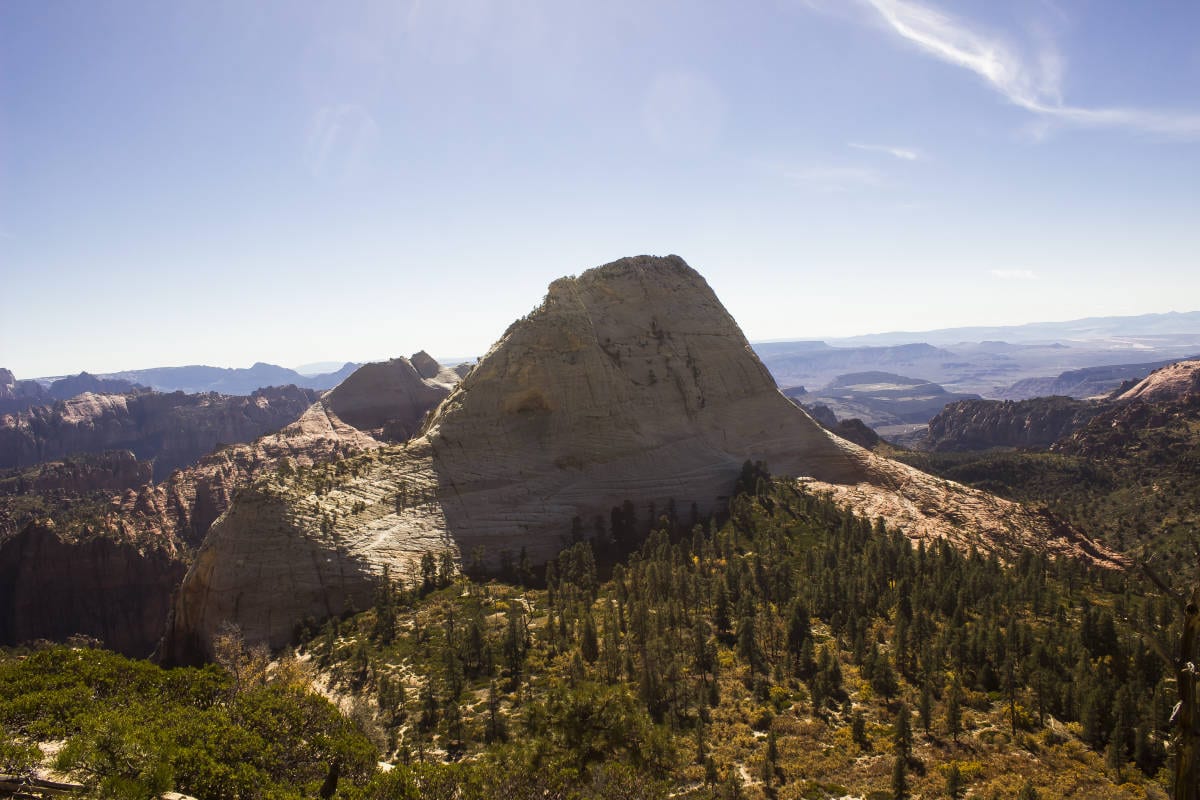
Option No. 3: North Guardian Angel
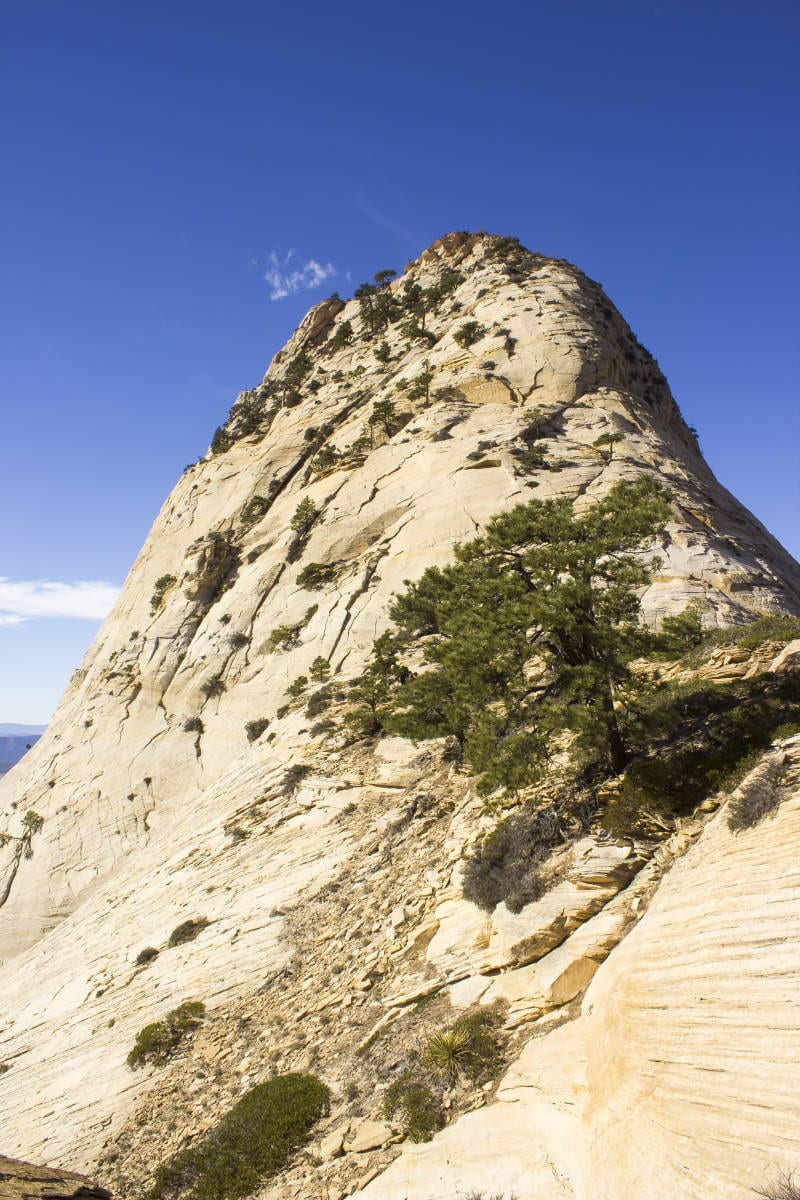
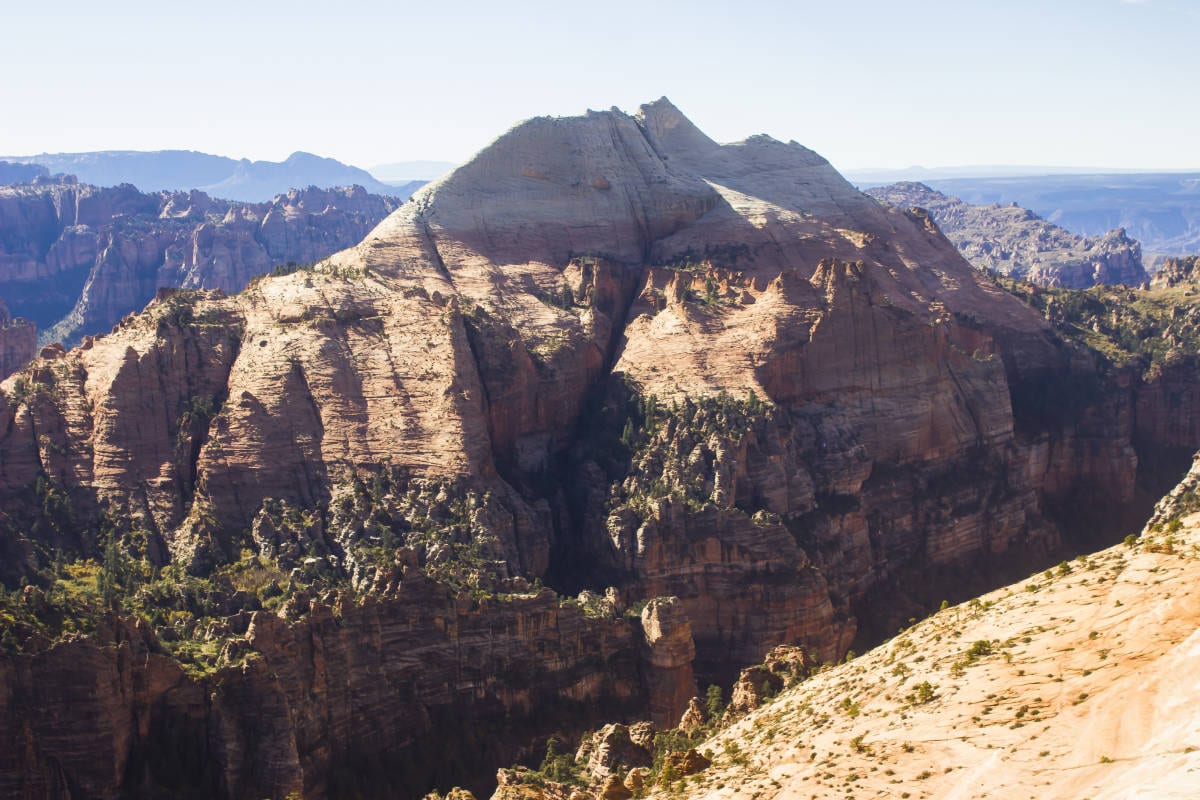
The ascent of North Guardian Angel is a steep and dangerous technical climb that requires ropes, harnesses, slings, and at least one climber who knows how to lead and establish anchors and rappel stations. This is a serious climb and needs to be treated as such. However, for anyone with the know-how and the experience to attempt a mountain of this stature, North Guardian Angel is a joyous romp up sandstone ledges, slabs, and faces leading to the narrow summit ridge. A successful climb of this peak is a nice feather for any climber to have in his or her hat.
When viewing the mountain from the overlook, notice the low ridge that leads from left to  right to where the mountain gets steep. The low ridge is your first objective. Take the same trail east from the overlook, down into the draw on the west side of East Northgate Peak. Head south in the draw, and look for a faint climbers’ trail that soon leaves the wash to the west, paralleling the dry watercourse until it reaches the sandy bottom. Re-enter the wash, and follow it until the trail heads up the eastern bank. Follow this trail as it contours on the east bank before disappearing for good into the trees and brush. While faint at times, the main trail seems to head towards the eastern side of the low ridge. Regardless, pick the easiest line through the brush until the low ridge is reached, approximately half a mile from the overlook.
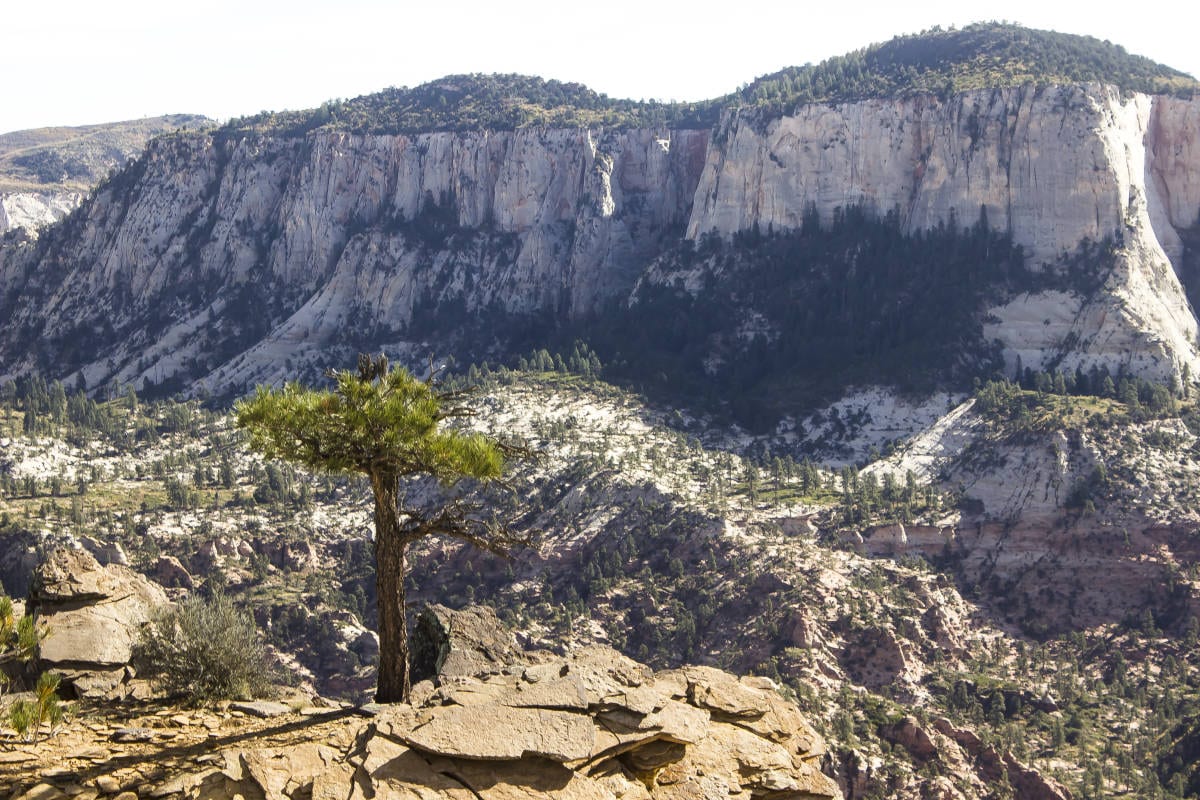
From the base of the ridge, follow class 2 and 3 slabs to the top. This section is easy climbing, but the easy part is just about done. Once the top of the ridge is reached, incredible views open up the Subway and South Guardian Angel. Take the time to walk out on a short spur that juts to the southeast for even better views.
Head towards the upper mountain, and shortly reach a wall split by an angled crack. Climbers may either climb the crack directly (steep, mid-fifth technical climbing) or contour right on tiny ledges to reach a lower-angled third- and fourth-class wall that is much easier to climb. Aim for a good-sized pine tree with slings wrapped around its base. The lead climber will want to set up anchors and belay the rest of the party from here.
At this point, another decision must be made: whether or not to bring the rope the rest of the way up the mountain. Three steep sections above could certainly warrant the use of the rope, but placements for anchors are in short supply above the tree. On our climb of the mountain on Nov. 1, we elected to forgo the rope, but this is a decision that must be made by each party.
From the anchor tree, head up and left, aiming for another tree that grows beside a vertical wall. Climb this wall, utilizing the tree to help you ascend. Continue climbing, keeping relatively close to the broad ridge, picking your way up via the easiest-looking line. Another steep section climbs under a pine tree and heads up steep seams and slabs. Scramble for another few hundred feet until the last steep step is reached. Climb up fourth-class terrain for forty feet until you top out on the first false summit of the summit ridge. From here, walk the ridgeline, dropping down to the south (on the left side) where necessary. Easy hiking leads to the summit on the far southwest side of the peak with sheer cliffs dropping away on either side of the ridge. A coffee can contains a glass bottle with a summit register.
Now for the descent. Normally most of these columns state to simply reverse direction and return the way you came, but in this case, consider this warning. The descent of North Guardian Angel, especially unroped, is stressful and dangerous and requires extreme care. The last steep step before the summit ridge has no trees to rappel from, so this spot, in particular, requires an immense amount of care to downclimb. Below this, however, there are two trees that can be used as rappel stations: the one you climbed under on the ascent, and the first tree with the slings. For less experienced climbers, setting up rappel stations would be a much safer alternative. Utilize these as needed, and be extremely cautious. When you arrive at the low ridge, the serious dangers are over and now you can reverse direction and return the way you came.


